Trusted name in Patch Testing
 Serving dermatology since 1981 Chemotechnique is proudly recognized as a trusted name in Patch Testing. Patch Testing is considered the gold standard for the diagnosis of Contact Allergy. Patch Testing is a provocation test instigating Allergic Contact Dermatitis (eczemas caused by contact allergy).
Serving dermatology since 1981 Chemotechnique is proudly recognized as a trusted name in Patch Testing. Patch Testing is considered the gold standard for the diagnosis of Contact Allergy. Patch Testing is a provocation test instigating Allergic Contact Dermatitis (eczemas caused by contact allergy).
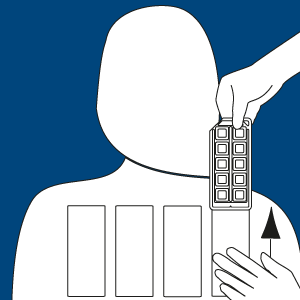
Alongside providing Products necessary for Patch Testing, such as the acclaimed IQ Ultra™, IQ Ultimate™and BasIQ Ultra™ and a wide range of Patch Test Haptens, Chemotechnique offers complimentary online services;
• Detailed Patch Test Instructions
• Downloadable Patch Test Products and Reference Manual
• In-depth Hapten information for each hapten following the  button
• Printable Patient Instructions - an easy way to prepare patients for the Patch Test process
 Apply for an account to access information on local distribution and tools such as the Patch Test Record Forms.